Today, distance learning and remote work are commonplace. Similarly, business video platforms like Microsoft Teams have become more common than ever. A customized Microsoft Teams backdrop picture may be created to match your requirements. Whether you're seeking to reveal the truth about your new workplace, want a more formal or personalized setting, or your company is organizing a special event where a consistent or branded background is this tutorial is going to help you in all such cases.
You have the choice to add background to Teams video when you utilize Microsoft Teams. Since remote work has become the norm and employees have discovered means to arrange meetings, Teams have become actively helpful. If you have children or pets or just don't want others to see inside your house, you may use custom backdrops. You can even design a unique backdrop for your most crucial business meetings. Here, we will demonstrate how to use a custom picture as the Teams meeting background. You can also use this guide to learn how to add a background in Teams video calls.
In this article
Part 1: How to add a personalized image for Teams meetings background
Microsoft Teams launched virtual backdrops, a tool that enables users to build their virtual meeting places by obscuring their real surroundings, to help maintain the emphasis on the most important issue. In Teams meetings, you may conceal your location and increase user privacy by using virtual backdrops. To feel more prepared and less distracted, many Team users like to change their backdrop before entering a meeting. We'll walk you through the process. How to configure several backdrop settings and background pictures in Microsoft Teams is covered in this post.
Step 1 Launch Microsoft Teams on your PC.
Click Turn on new meeting experience in your profile settings. To make modifications, shut off and relaunch Teams.
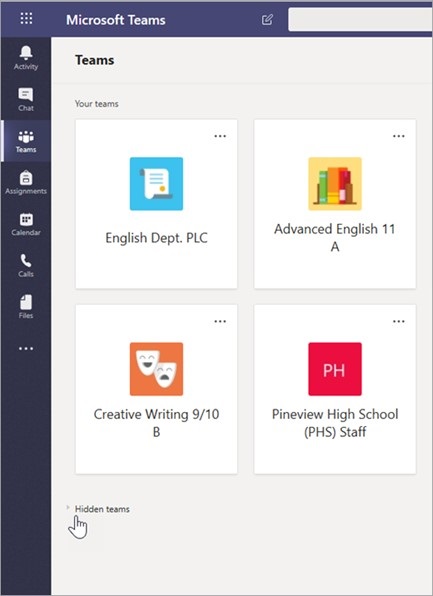
Step 2 Select ‘Join a Meeting’.
If you are hosting, choose the Meet Now option or the meeting link. Toggle the button to the on position to make sure your camera is on. On the menu to the right of the camera icon, choose Background filters.
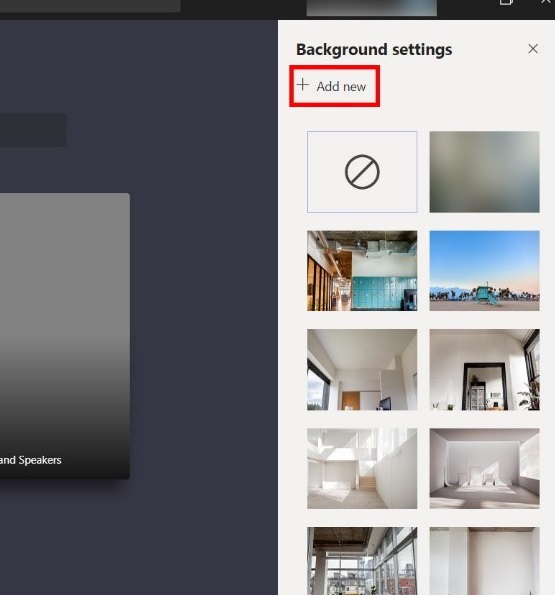
Step 3 Click + Add new, then choose your unique picture.
All of the available photographs will be shown as thumbnails. Simply click the + Add new option, then go to and upload your unique picture. Any uploads folder that you regularly use may be browsed. Images may also be dropped into the interface using File Explorer. Click the preview button to check that your picture will work and to see how you will seem with it.
Part 2: How to Change Your Teams Meetings Background
You may alter your backdrop even if the meeting has already begun or you've joined someone else's meeting. Before you ever attend a Microsoft Teams meeting, you may modify your backdrop. Toggle the switch between the video and microphone switches to modify your backdrop before a meeting. If you have any background settings, they will show up in the right sidebar. You have two options for your background: blur it or use a picture in its stead. Choose Add new if you're using your picture.
Step 1 Select Show background effects by clicking on the three dots in the center of the button bar at the bottom of the screen.
The identical Backdrop settings column will appear on the right for you, giving you the option to blur, modify, or create a new background.
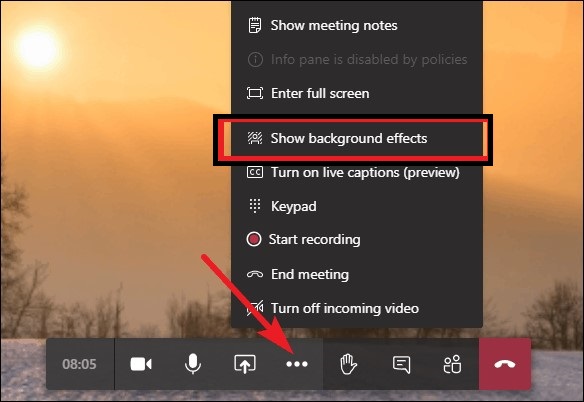
Step 2 A sidebar menu will appear on the right side of your screen when you choose Show background effects.
A backdrop may be selected from the sidebar menu. You will have the choice of using a custom picture or blurring your backdrop. Select Add new to add a default picture to the upload.
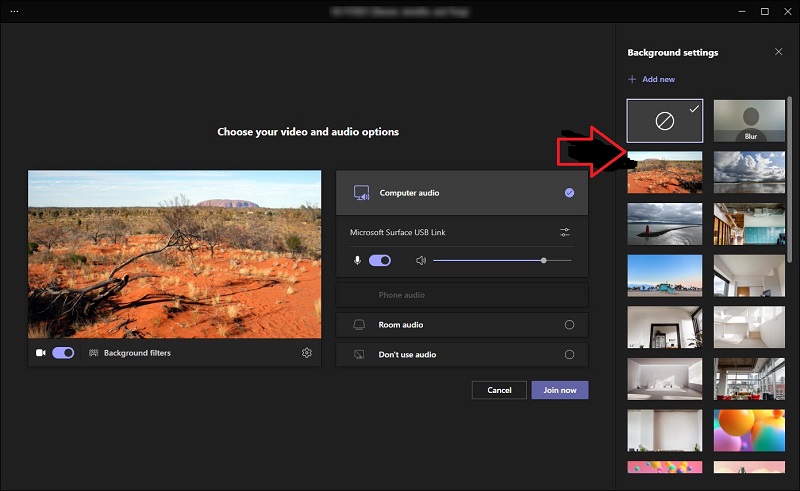
Step 3 When you're satisfied with your new backdrop, click Apply or simply choose Stop preview to return to your old wallpaper.
When you see one you like, you can either choose it straight away or first preview it to ensure it meets your standards.
Part 3: How to Blur The Background In Your Teams Meetings
While participating in Teams meetings, you may set one of Microsoft Teams' many default pictures as your backdrop image. However, in case this does not help you go unique, you can blur your background to the required extent as well. When you don't want other team members to see your backdrop in Microsoft Teams, knowing how to blur your background might come in extremely helpful.
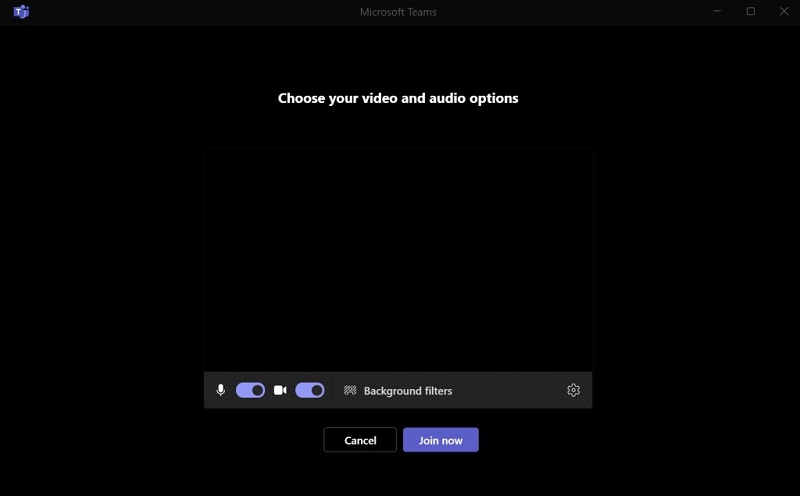
Step 1 Start a meeting on your PC in the first step.
The pre-meeting page will appear after that, where you may make some modifications to your video and audio.
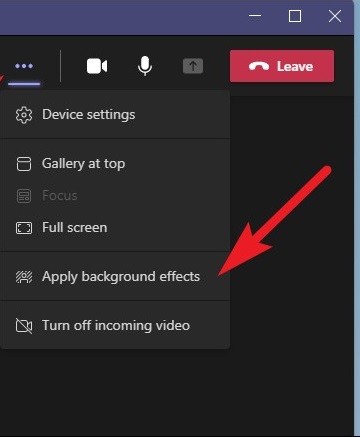
Step 2 After the meeting has started, look at the menu bar that displays on the video screen just below the center.
To access the menu, click the three dots, then choose Show Background Effects.
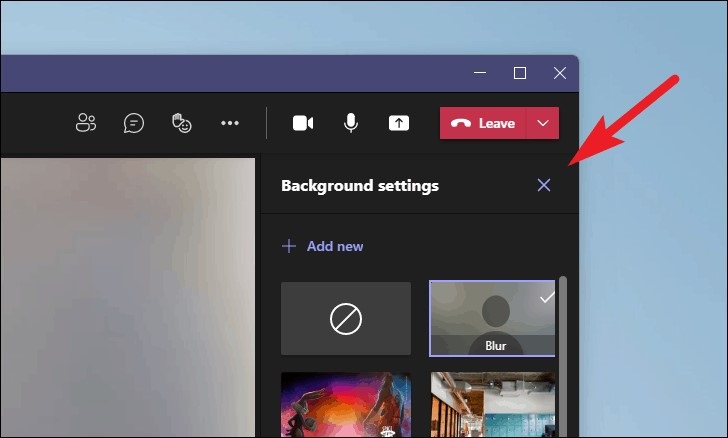
Step 3 On the right side of the screen, the backgrounds box will open.
Scroll through all of the choices Microsoft has included, choose the virtual backdrop or blurring option you like, and then continue with your conference.
Step 4 Once finished, the backdrop will remain in every meeting you attend.
You may then join any meeting. Whether you're hosting a meeting or attending one, your backdrop is the same, and a standard call also functions in the same manner.
FAQ
1. How to change Teams meeting filter?
Step 1 Click the More Actions icon once you are in your Teams meeting.
Step 2 After that, click Background effects and set the backdrop.
Step 3 Choose your preferred filter and at the bottom of the Background Settings dialog, click the Apply button.
2. How to set Teams meeting mirror camera?
You can get a preview of your camera if you enter the Teams settings and choose Devices. As you can see, if you present anything with text, the text will appear backward. Find a mirror and take the identical item; you will observe that it reflects the words in the same manner. Any text in the preview will be reversed, and your camera will be mirrored. The camera will be mirror-imaged when you verify your vision during the meeting.
3. How do I change the background in a video?
One method to produce more visually appealing material is to use an original backdrop for videos. You need to keep an eye out for elements that will make the video editing process easy and seamless to pick the backdrop changer. Transition effects, the availability of backdrop templates, media upload formats, a user-friendly user interface, and if it enables free video download are other elements to consider when selecting a BG remover. Fortunately, we have that one that fits perfectly for the job. That is Wondershare's Vid BG Remover.
Website Link: Vid BG Remover
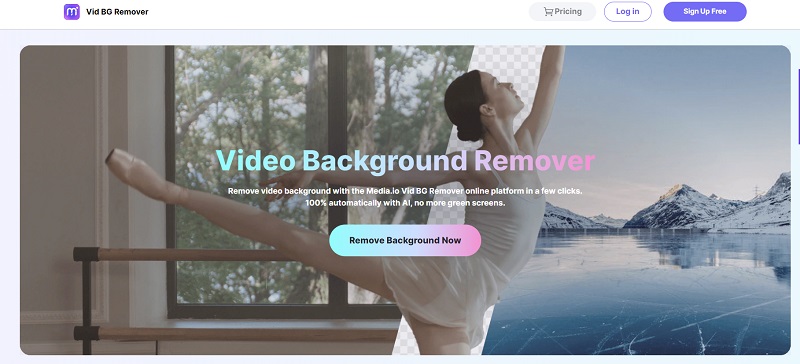
One of the most often used programs for erasing video backgrounds is Vid BG Remover by WondershareFor a better editing experience, it enables editors to quickly adjust video effects and evaluate VR, panoramic, and 360-degree recordings. New backgrounds may be simply dragged into the movie sequence and edited to properly match the film. While there are several techniques to remove the dull backdrop from your video, users may quickly make visually spectacular films and alter them with this video background editor.
Key Features:
Vid BG Remover offers several features that make it simple to erase the backdrop after green screen video creation. The most important features of Vid BG Remover include the following:
Simple and intuitive interface:
Vid BG Remover has a simple web UI. It can be used by both novices and experts. You can alter different parts of the video handily, thanks to the drag-and-drop capability featuring online editing.
Multiple video formats:
Users of this video editor may upload and utilize videos in a variety of media types. Users may download videos in any format and submit other media types to use as backgrounds.
Remove Background Automatically:
Vid BG Remover requires you to upload your video and then the rest is assured with the platform. It removes the background automatically and you can download or share your meeting video afterward.
Use Customizations:
Editors may use the software's backdrop templates that have already been produced to modify their videos. Users may easily change the backgrounds of video scenes using these templates without having to bother about adding new media material.


