In the current scenario, social media has become a part of life for individuals. Despite age groups, everyone spends a considerable amount of time on Facebook striking 'Like' icons and sharing comments based on the posts round the clock. This article helps you to handle the GIF images on Facebook wisely. It is a common urge for everyone to make use of GIF images in the comments section and posts to express their feelings for Facebook posts. In this guide, you will learn how to delete a GIF on Facebook and how to download GIFs from Facebook in a detailed manner.
Part 1. How to Delete a GIF on Facebook Comment
In case if, you had posted a GIF image on the Facebook Comment, then how to delete it without any issues. Follow the below steps for better understanding.
Step 1. Open the Facebook Comment
Login to your Facebook account and go to the GIF comment you had made earlier for your friend’s Facebook post. Search for your friend’s post and click the Comments label beneath the position to expand the list. From the displayed comments, you have to figure out your GIF image comment by scrolling down patiently.
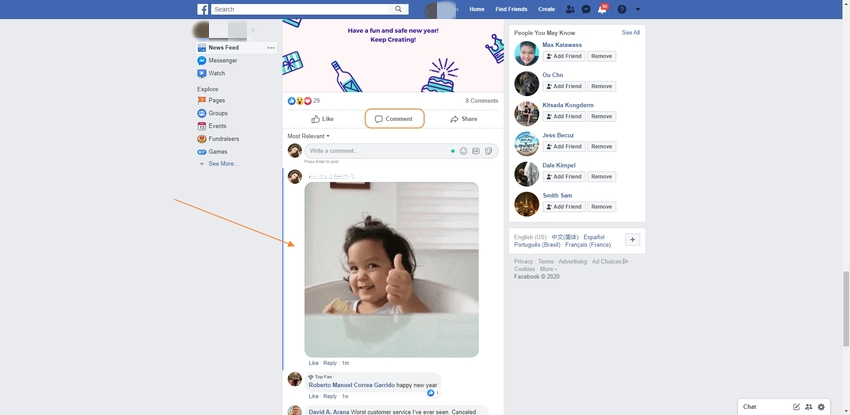
Step 2. Choose Delete Option
You must tap the GIF image on the Facebook comment section and right-click to view the expanded list. From the options available, you have to select the Delete option to erase the GIF comment on your friend’s Facebook post.
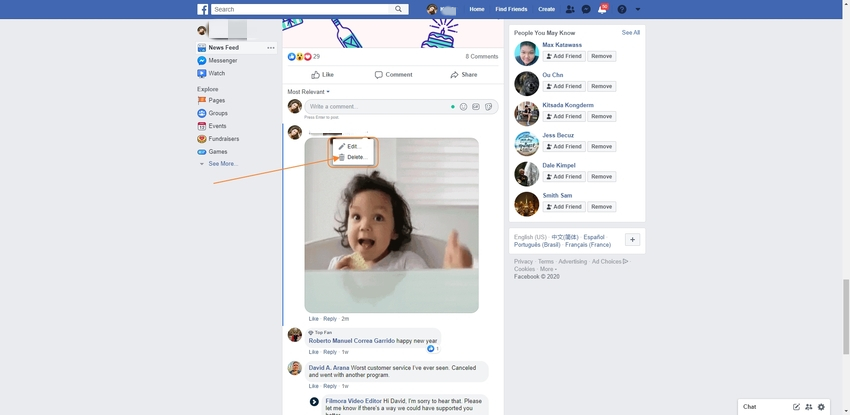
Step 3. Delete Confirmation
When you select the Delete option, the screen shifts for confirmation, and here you must hit the Delete option again to confirm the GIF image deletion. It is a permanent deletion process, and it is impossible to restore the deleted GIF image at its original location.
After the deletion process, view the comment section in your friend post to ensure the removal of GIF image entirely without any flaws. You will not find your GIF comment on your friend’s Facebook post anymore. The above process deletes the GIF image from this platform without any efforts.
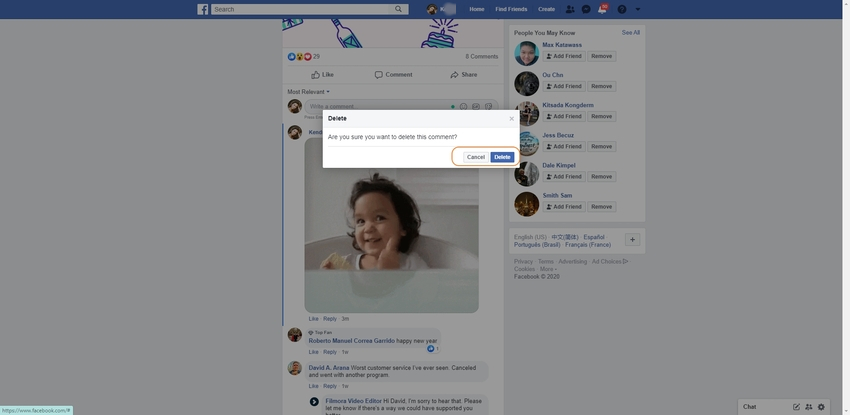
Part 2. Delete GIF post on Facebook
In this section, you will learn how to delete GIF posts on Facebook? You would have posted a GIF post on your Facebook wall by mistake, and you might have stuck up what to do next? Immediately you will try to Google it to learn the GIF post deletion procedure on Facebook to overcome the situation. The below stepwise process educates you in the process of proper deletion of GIF post. Follow the below steps carefully for the successful deletion of GIF posts on your Facebook account.
Step 1. Log in to Facebook
The first step is to enter the Facebook credentials and Login to the Facebook account. Go to your profile and reach out to the GIF post, which had posted earlier by mistake. You can either go your profile or scan the home feeds to spot out your GIF posts on the common wall.
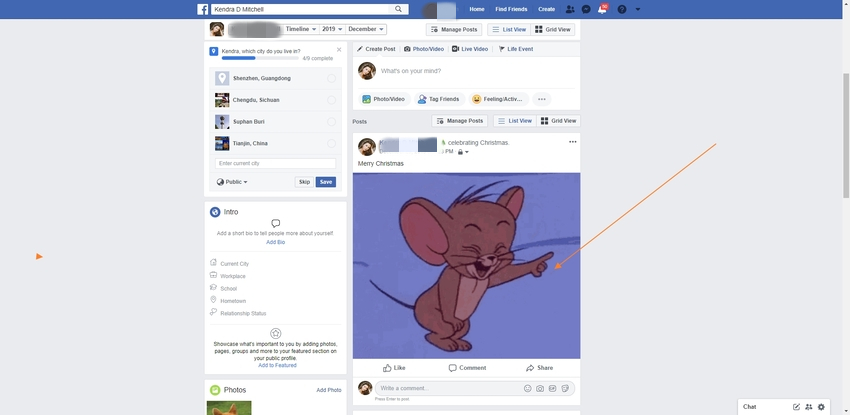
Step 2. Navigate to Delete Button
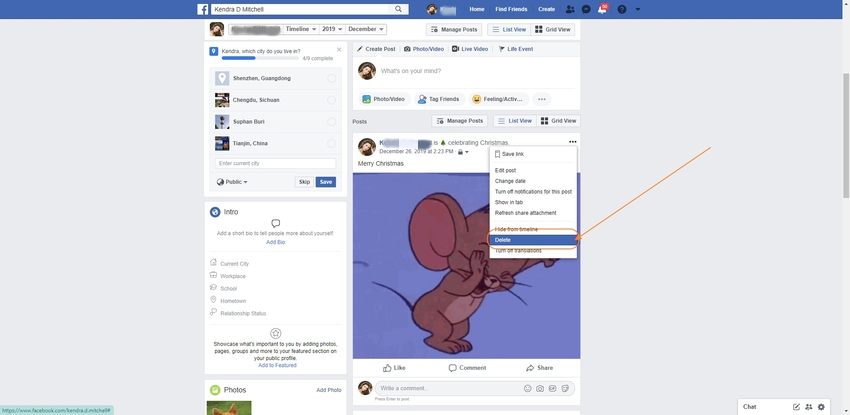
You must tap the three horizontal dotted lines nearby your profile name above the upper-right side of the GIF post. A popup window appears beneath the post with the list of options like Turn off notification for this post, Save link, Edit, Delete, etc. In this expanded menu, you must select the Delete option to delete the GIF post on Facebook.
Step 3. Confirm the Delete Operation
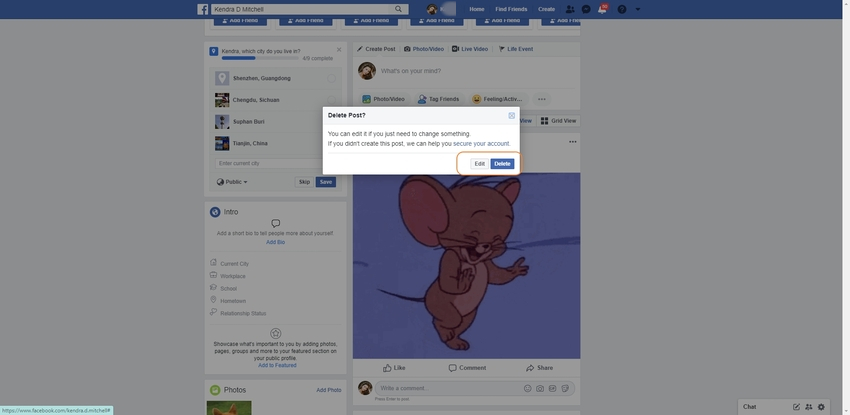
You must click the Delete button and confirm the operation again. This action deletes the GIF post in few minutes effortlessly. This confirmation leads to permanent deletion process. Once you tap the Delete button again the program automatically triggers the deletion process without any delay.
When you go back to your wall on Facebook and check for this post, you will not find any GIF posts anymore. This step will erase the GIF posts without any flaws.
Part 3. How to Download GIFs from Facebook?
You might get super excited when you surf through the GIF images on your Facebook. It would be difficult for you to download the same in your phone using standard ways. Facebook does not allow you to download any post into your device easily. You need to know specific steps to download the animated GIF from your Facebook account into your device. It is enough if you follow the below steps for the successful download of GIF image in your local storage.
Step 1. Open Your Facebook in Your Phone
Launch the Facebook app on your phone (here I will use iPhone as a sample, Android has similar steps as iPhone).

Step 2. Find a Favourite GIF and Save It
After open Facebook, search a GIF that you like. Beneath the GIF picture, you will be able to find three icons. The second tab represents the Copy Link mode, and by selecting this mode, you can copy the GIF image URL and open it on any browsers.
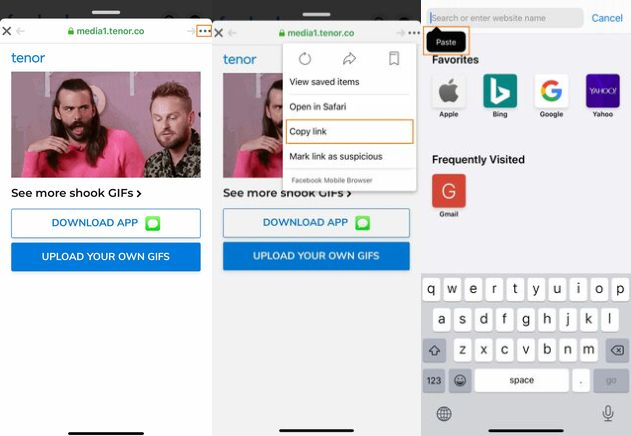
After opening the GIF URL in the browser, you could share it to another social platform, such as Whatsapp. You can't save it directly into your camera roll.
Note: If you want to save GIFs from Facebook directly, we will recommend the use of the Facebook web, not Facebook app in your phone.

Summary
Therefore, this article has given better knowledge related to GIF image deletion, download process on Facebook. Now you must be familiar with how to delete a GIF on Facebook effectively. You must watch out the steps carefully to establish the procedure flawlessly. Few clicks are sufficient to carry out the desired process in no time. The steps are simple to follow, and it takes a few seconds to complete the deletion and download process. Make use of this article and work with GIF on the Facebook platform efficiently.
Let's simply to introduce an all-in-one desktop software for video/image/audio converter and edit video, which is called Wondershare UniConverter. More specific information about the application, keep reading the following features.
- · Easiest to use software for beginner users.
- · 90x faster speed and keep your file in high-quality.
- · Burn video and other media files to DVD effortlessly.
- · Transfer videos from computer to iPhone or Android mobiles without using iTunes.
- · versatile Toolbox includes GIF maker, image Background removal, VR converter, and other newest functions.


