While working on a project, if you're running out of time and want to complete some documentation without typing, you can try Voice typing in Google Docs to expedite things. If you are new to the process, it may take some time to get acquainted with the commands and how Google Docs accepts your speech. However, things can get pretty easy once you are through, and you can complete your tasks within no time.
In this article, I will show you how to convert speech to text in Google Docs. You will also get to know how to control it through your voice commands, add punctuation marks to the content, and many other things to help you simplify your work.
In this article
Part 1: How to Use Voice Typing in Google Docs [Step-By-Step]
At the time of this writing, you can voice type Google Docs only while using the Google Chrome browser. Therefore, it is imperative to sign in to your Google account using the said web browser and then follow the procedure given below to do Google Docs speech to text:
Step 1: Open a Blank Google Docs Document
After logging in to your Google account on Google Chrome, click the Google apps icon, scroll down, and click Docs. Click Blank from the upper-left section to open a blank Google Docs document on the next page.
Step 2: Enable Voice Typing for the Document
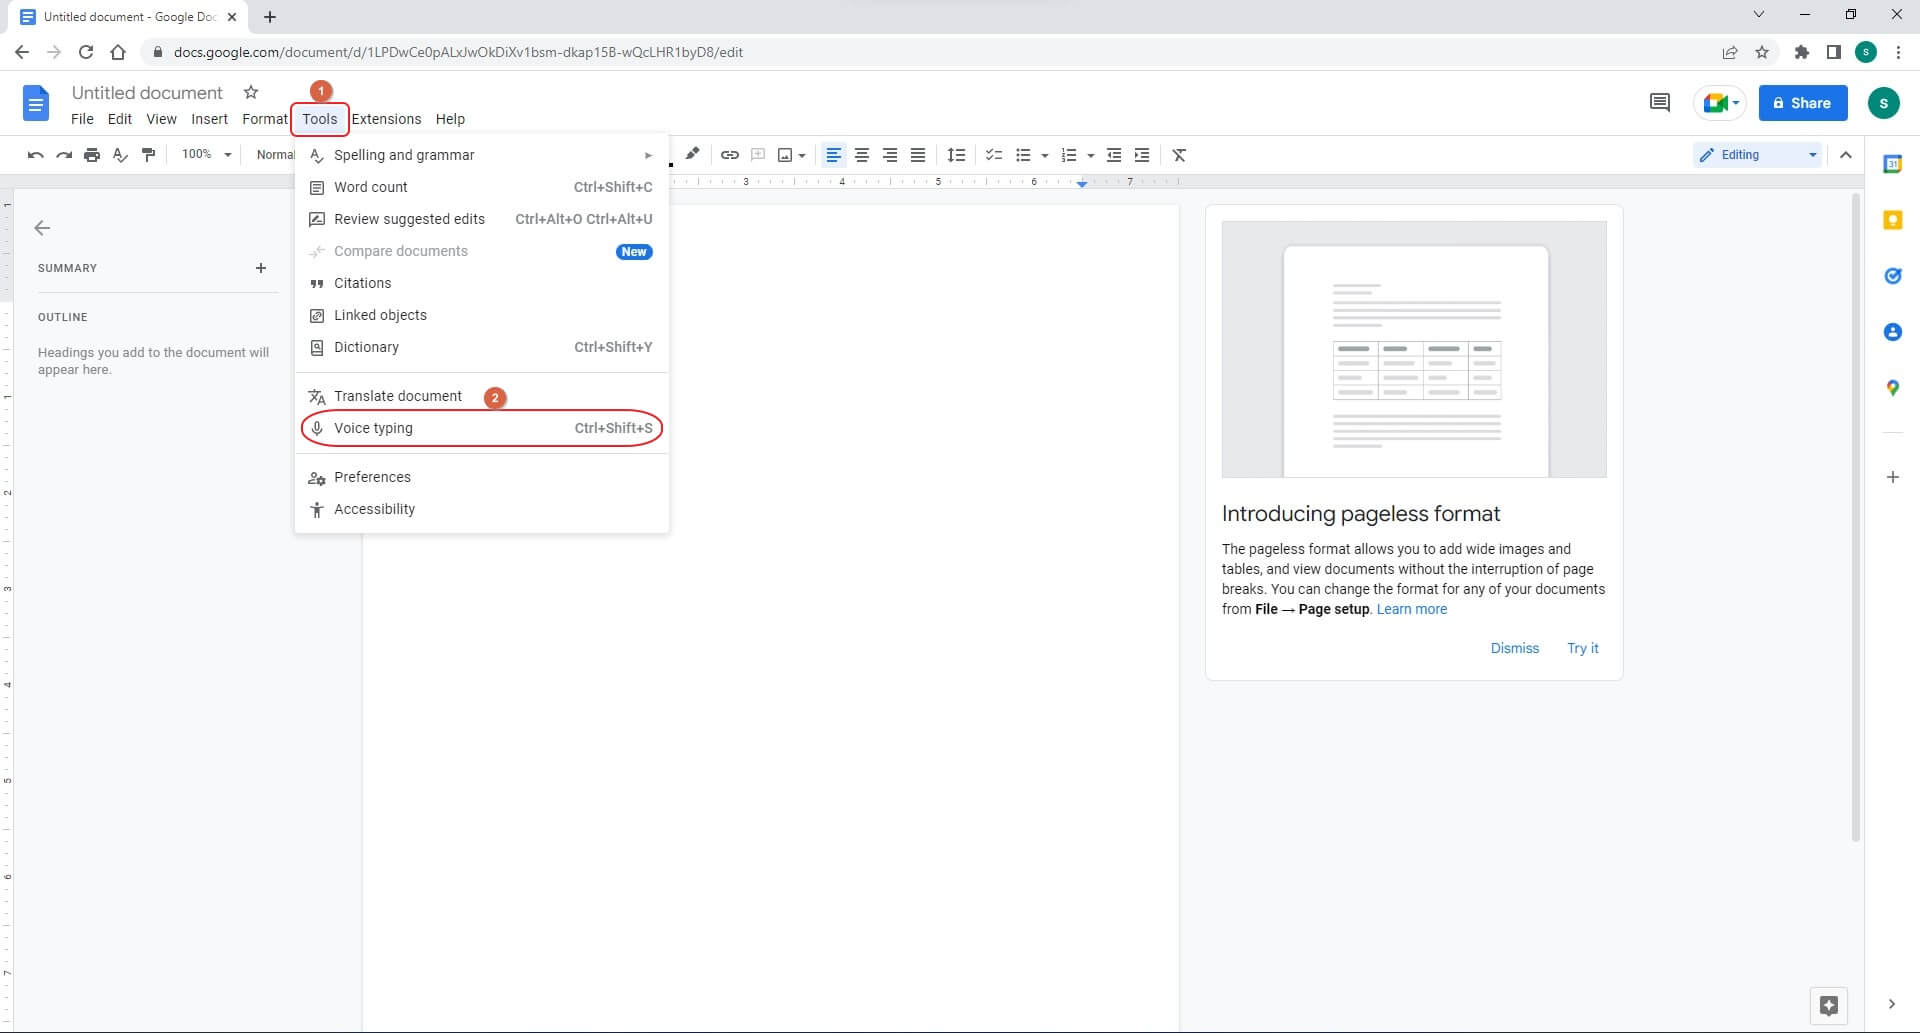
Go to Tools from the menu bar at the top and click Voice typing. Alternatively, you can press the Ctrl + Shift + S keys together to turn on Voice typing for the document.

Step 3: Start Using the Voice Type Google Docs Feature
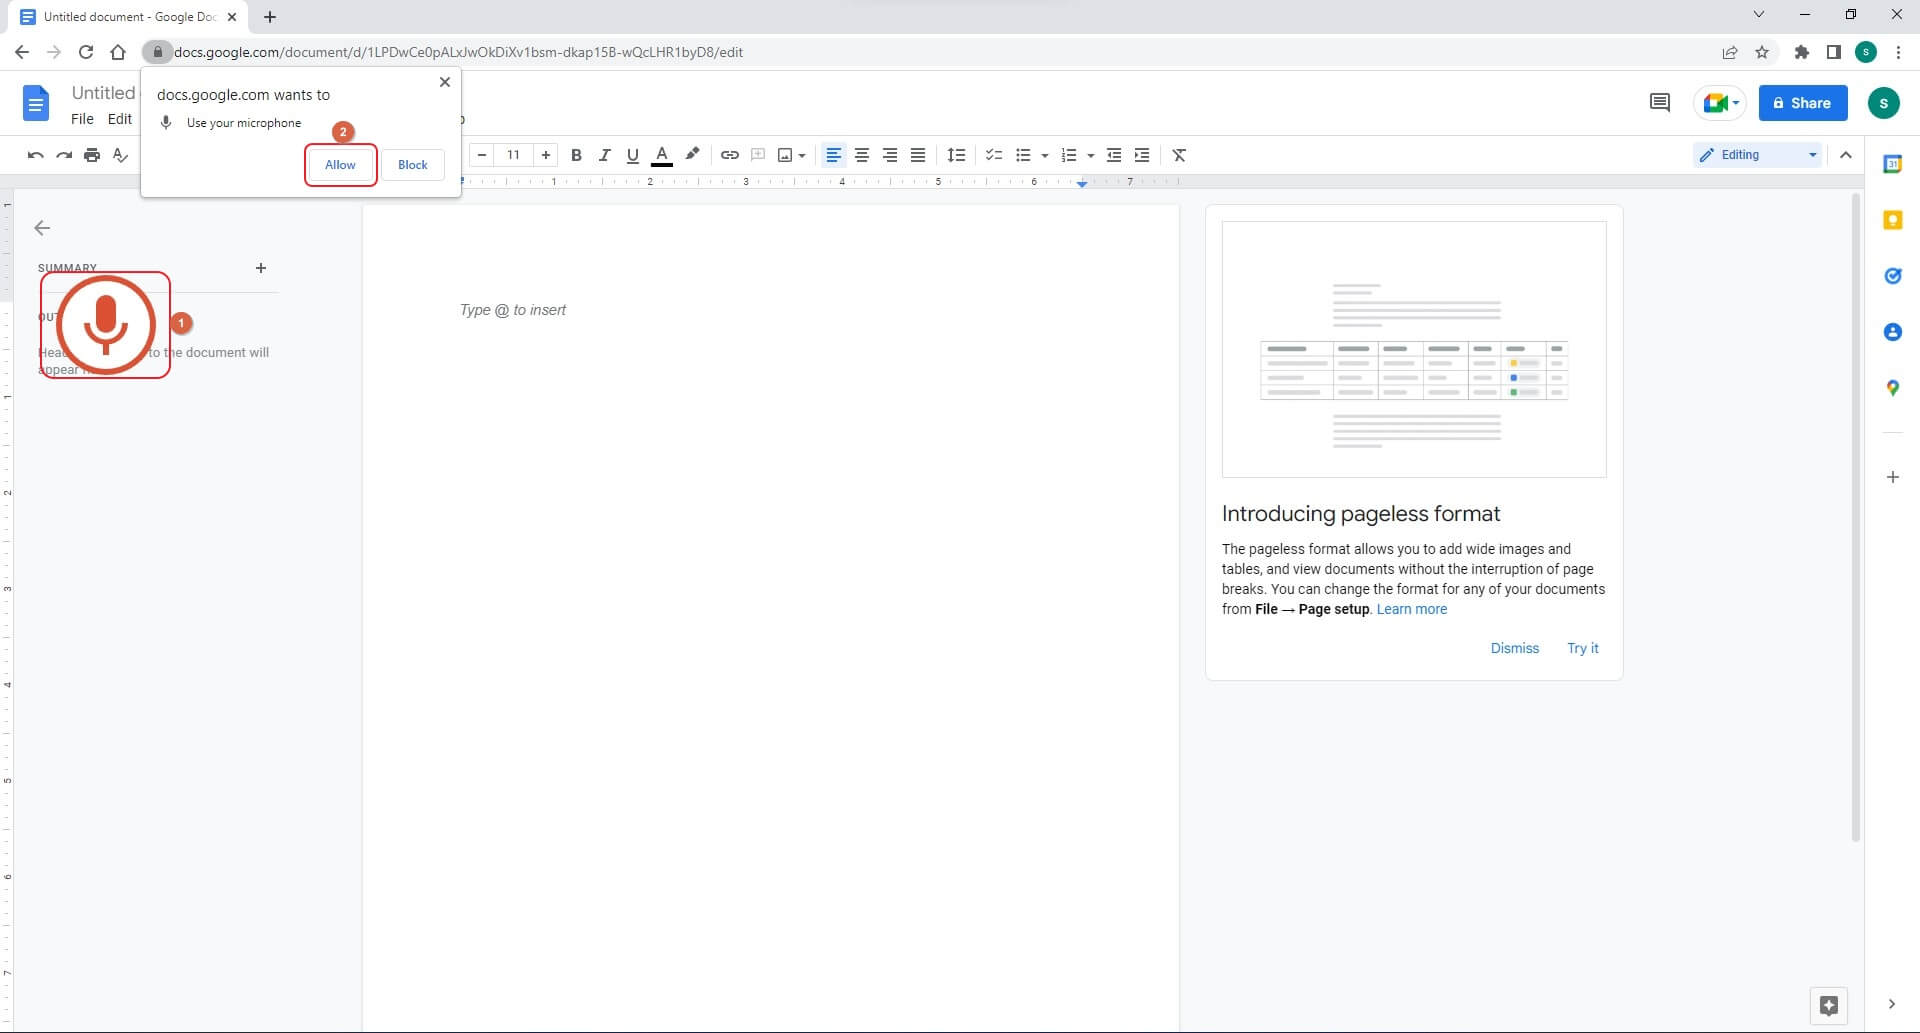
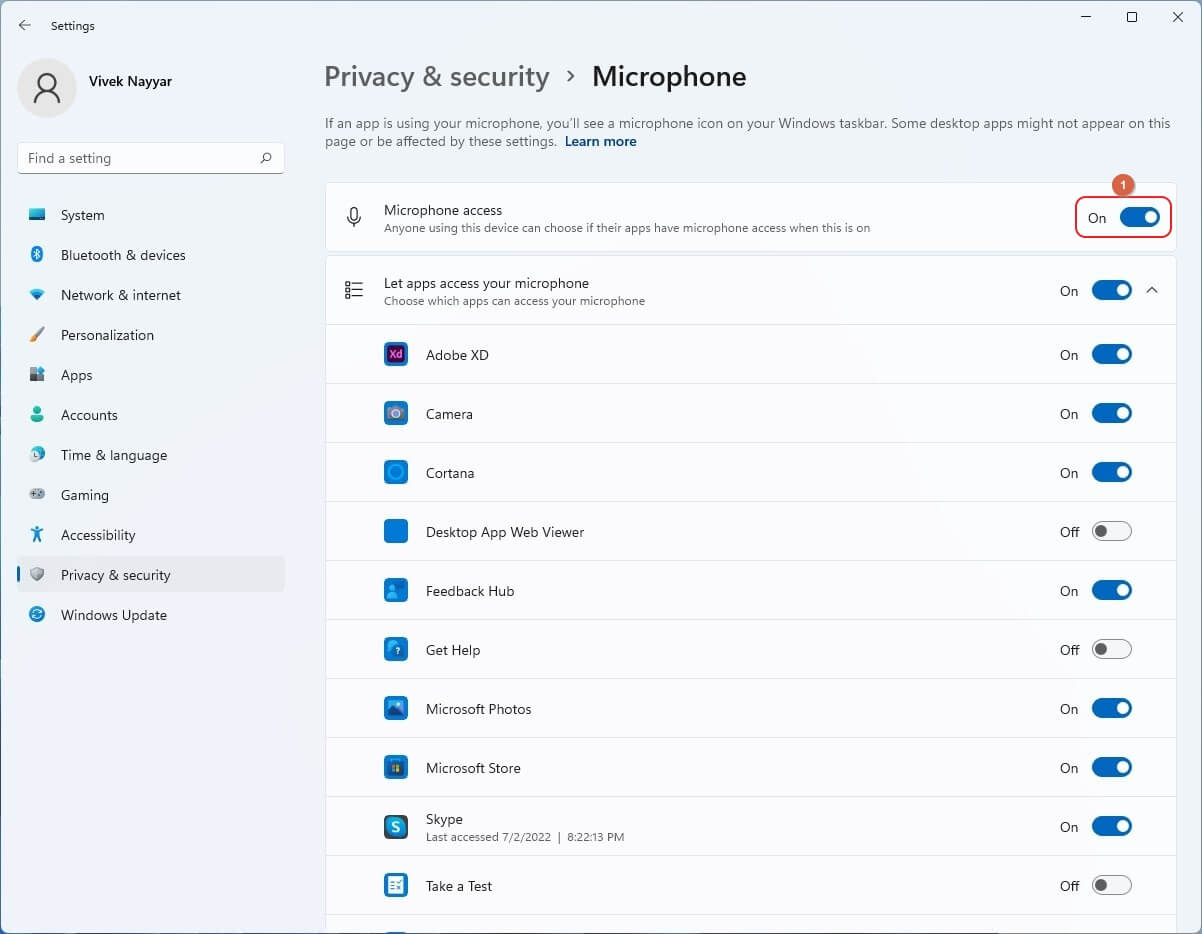
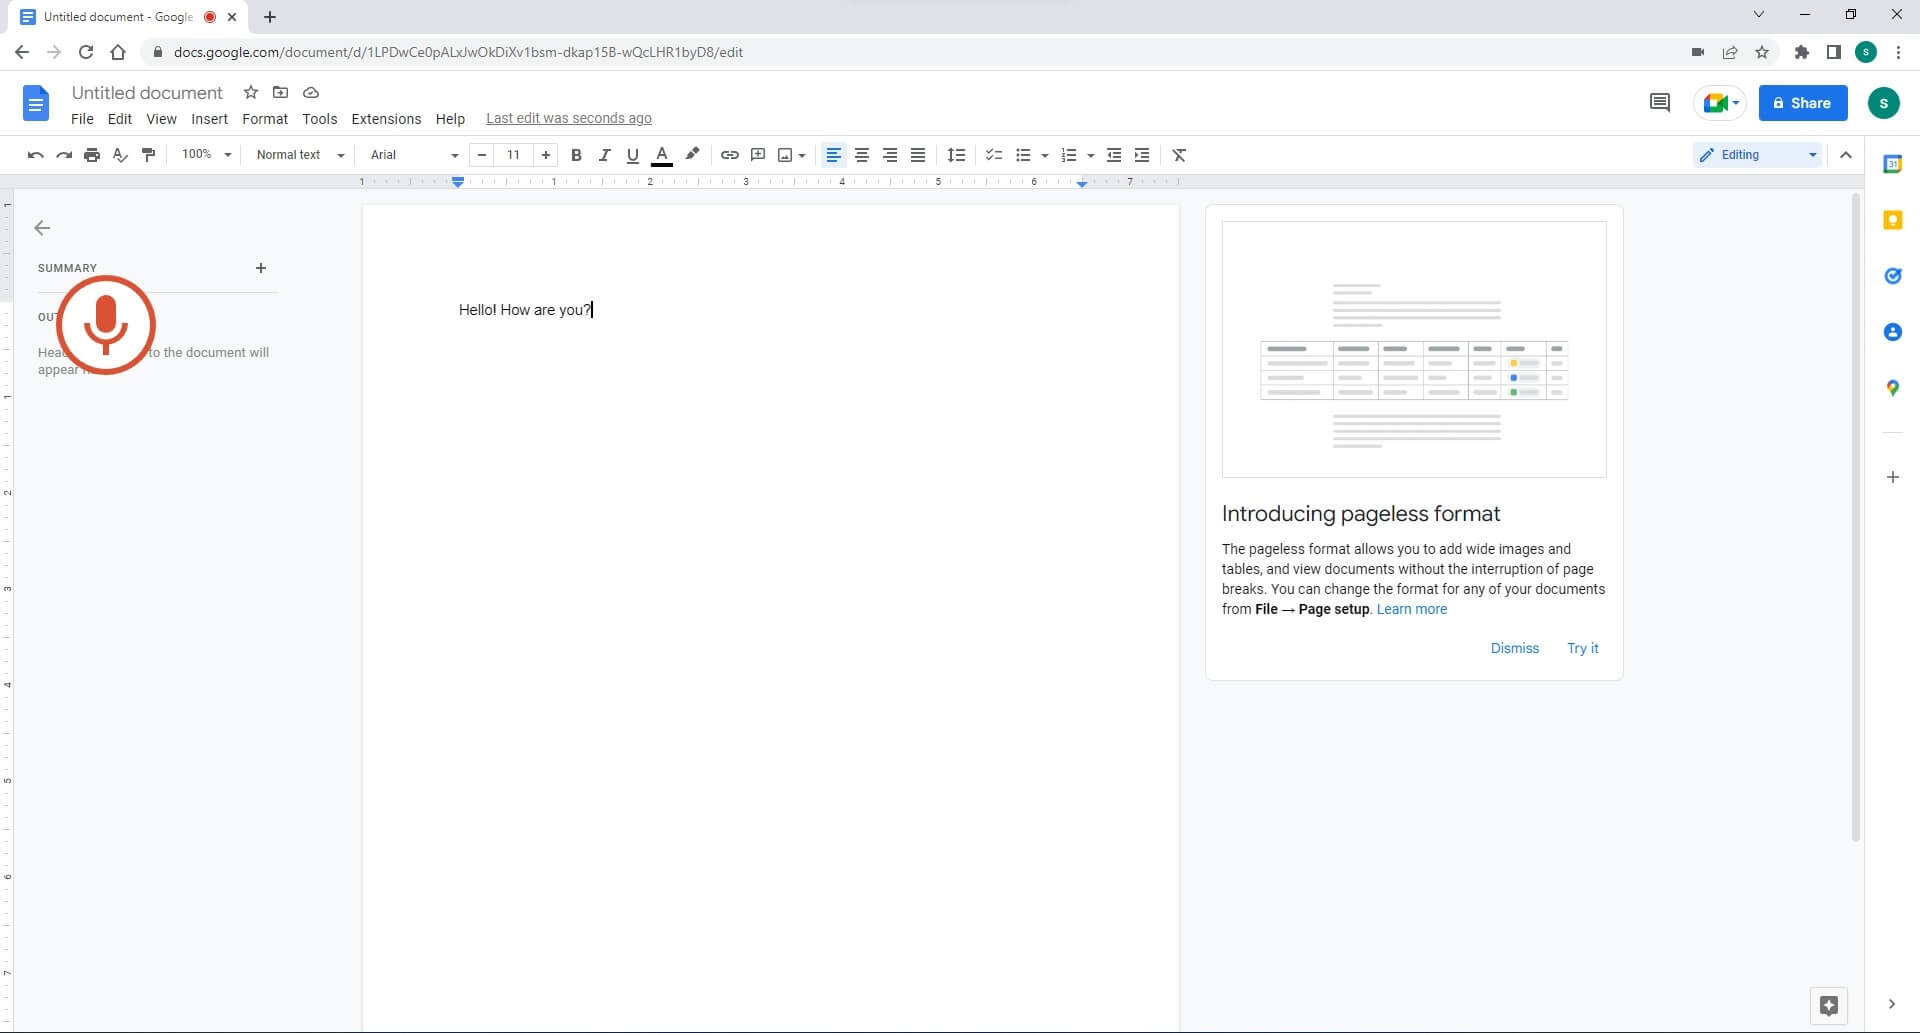
Make sure that the cursor is placed inside the document and is blinking. Click the Microphone icon that appears on the screen. When the consent box appears, click Allow to give Chrome permission to access your microphone. Now, you can start speaking into the mic to use voice to text Google Docs.


To add punctuation marks, you can name them. For example, adding a period can say, period; likewise, to add a new paragraph, you can say, new paragraph.

Part 2: How to Use Voice Commands to Create, Edit, and Format Professional Documents in Google Docs
When the term 'professional document' appears or is talked about, all that comes to mind is well-formatted content with proper alignment, correctly highlighted phrases, italicized words, etc. When using the Google Docs speech-to-text feature, everything can be done through your voice. A couple of noteworthy commands to make your speech to text Google Docs easier include:
- Select <phrase or word>: To select a phrase or word.
- “Bold”: To bold the selected phrase or word
- Italicize: To italicize the selected phrase or word
- Underline: To underline the selected phrase or word.
- Increase Font Size: To increase the font size of the selected phrase or word
- Decrease Font Size: To decrease the font size of the selected phrase or word.
- Align Center: To center align a paragraph.
- “Align Justified”: To justify aligning a paragraph
- “Align Left”: To align a paragraph left.
- Align Right: To align a paragraph right.
- “Cut” / “Copy” / “Paste” : To cut, copy, or paste the selected phrase or word
- Insert Page Break: To insert a page break from the cursor point.
- “Insert Header”: To add a header to the document.
Part 3: Tips for Using Voice Typing in Google Docs
You can safely skip this section if you're already familiar with the voice type Google Docs feature. On the other hand, if you are new to the process, here are a few pro tips that will help you get familiar with using the microphone for the Google Docs speech-to-text recognition method:
- Before getting started, take out some time to practice voice typing in Google Docs and use the most commonly used commands that will help you in formatting and decorating the document to make it look professional.
- Invest some funds in a good quality microphone to avoid time wastage while dictating
- Dictate your content at a clear and appropriate pace. This will give the voice recognition feature enough time to accommodate and process your commands.
- Dictate the entire paragraph without worrying about the errors. Once you are done, use the ‘Select’ and other commands to correct the erroneous phrases and words, and format the content accordingly.
- Try using your voice to control Google Docs as much as possible, and use the mouse and keyboard only when needed.
- Do not hesitate to use the 'Undo', 'Select', and 'Unselect' commands during and after dictation to control and format the document, and make it look professional and well-written


